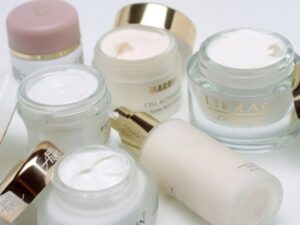
If you’re strapped for cash, or just allergic to most cosmetics, then you must try your hand at creating your own make-up at home. All it takes is a cup of imagination, a dollop of scientific common sense, a pinch of chemistry know-how, and a quart of creativity. From home-made eye liner to lip balms, lotions and shampoos, the sky’s the limit!
I often meet students, housewives and youngsters in their first jobs who are strapped for cash, but would still like to look good. They often ask me if it’s okay to try and make their own make up and if I have any reliable recipes. So I’ve thought long and hard about the pros and cons of handmade cosmetics, before I went about looking for and trying out various recipes.
The Upside –
1) They’re definitely inexpensive to make
2) They’re chemical free and organic. Therefore they’re environment friendly and gentler on mama nature
3) Unlike store bought make up and cosmetics, your home made cosmetics will not have an ingredient list that runs into 15-20 items!
4) You are not suffering from a funds crisis. But you’re an animal rights advocate, and would like to be absolutely sure that your cosmetics have not caused any cruelty against animals
5) Some people are allergic to all cosmetics. Even herbal cosmetics and the allergy-tested, top-of-the-line branded ones. These allergies are generally caused by preservatives, so home-made cosmetics are your best bet at looking good without itches or rashes
6) Make up that “is” natural, “looks” natural
8) Your hand-made cosmetics will heal and repair your skin while making you look good
9) Home-made cosmetics smell natural and amazing without using any artificial fragrance or perfume. Imagine smelling like chocolate and cinnamon 🙂
10) Last but not the least, if you’re an artistic person, then this will really satisfy your creative urges. Mothers and daughters can bond over DIY make-up projects.
The Downside –
1) Sterility and bacterial contamination is a major concern. This is the downside of preservative free cosmetics
2) For the same reason, these cosmetics do not have a very long shelf life. And it’s often not possible to make only a small amount, so consider giving away excess stuff to your friends and family. Or sell it for a tidy profit. You might still end up with a lot of wastage.
3) Just like any other art form, creating your own make-up will require patience and practice to find the perfect colours and consistency. You may not get all your measurements right from your first attempt.
4) Many ingredients are hard to find. It took me a lot of time and research to find the simplest and most reliable recipes. You will have to search online to buy ingredients like white bees wax pellets. You could also use shavings from a beeswax candle. However these candles are generally made of yellow beeswax. And most candles are made of paraffin wax, which don’t work as well.
5) Finding the right storage containers is a pain. You may have to develop the habit of saving old cosmetic containers. Wash them thoroughly and sterilize them with spirit and Savlon. Or try Amazon.com to buy fresh lip balm containers and tubes. You can also use pill boxes and small jewellery boxes to stores lipsticks and balms.
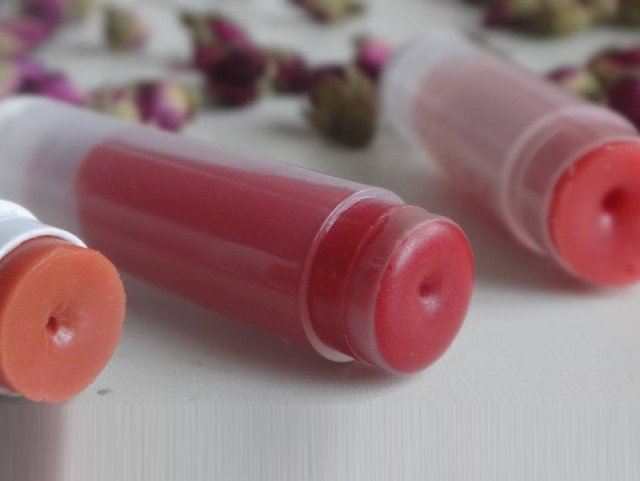
Recipe for home-made lipsticks – You can make lipsticks out of non-toxic wax crayons. Just pick a crayon colour that you like- pink, peach, orange, red, maroon, lilac or brick. Cut out a 2 inch piece of crayon and take off the paper wrapper. Fill a stainless steel pot with 2 inches of water. Set it on a stove at low-medium heat. Place a small glass bowl in the middle of this pot. This bowl will act as a melting pot. Now place 1/2 a teaspoon of solidified coconut oil into the melting pot. Use only 1/4 teaspoon if you want a matte finish lipstick. When the oil melts, place your crayon in it. Once the crayon melts and fuses with the oil, let it cool a little and pour into a small clean plastic jewellery box. Do not take your eyes off the concoction while it’s cooling because the wax will solidify quickly. You can use your finger or a lipstick brush to now apply your new lipstick. These lipsticks actually last a very long time.
If you do not suffer from allergies, add a little lavender oil for fragrance. And if you have thin lips, you can add a little cinnamon oil. This is the secret ingredient in most lip-plumping glosses. You can also add 7-8 drops of pure cinnamon essential oil to your regular lip gloss container, for instant plumping of thin lips. Make sure the oil gets evenly mixed with the gloss.
Recipe for home-made eyeliner – To make the coal, burn some dried almond flour (ground almond powder) on high flame. You can use unsweetened cocoa powder to make brown eyeliner. Use a mortar and pestle to grind it to a fine powder. Add a little olive oil to this powder, till you get the right consistency. Store this mix in a pill container, and use a fine brush to apply to your lid margins
Recipe for home-made mascara – Use the burnt almond again as coal. Add some Manuka honey to the coal. Mix and stir as you add till you get a thick soupy texture. Place this mix in a microwave for 10 seconds till it is liquid. Pour this mix into an old mascara tube once it cool. Make sure you cleaned and sterilized the old tube and brush with Savlon.
Recipe for home-made coloured lip balms – Take 1/2 spoon solidified coconut oil, 1/3 spoon shea butter, 1/4 spoon mango butter and 1/2 spoon of beeswax pellets. Place all ingredients in a bowl and heat it in the microwave for 10 seconds till liquid. To add colour, you can use iron oxide powders and pigmented mica powders. Mix and match various micas till you get your desired shade of pink, red, maroon or nude. If you can’t find mica, then just use sliver of your favourite lipstick. Or add a small piece of your favourite shade of nontoxic wax crayon and blend it with the oils over a melting pot. Quickly pour the hot mixture into a lipbalm tube or a small pill box. Keep in the fridge till it solidifies.
Recipe for home-made bronzer – You need cinnamon powder, nutmeg powder, unsweetened cocoa powder and cornstarch. Making the right shade of bronzer will take time, practice and perfect measurements. Mix varying ratios of the powders till you get the right shade for your skin tone. You can use it directly. Place in a clean container and apply using a brush. If you want a cream bronzer, then mix equal amounts of the coloured powder with shea butter to turn it into a cream. You can add 10 drops of essential oils for a fragrance of your choice.
Recipe for home-made body lotion (for winters) – Take 3/4 cup of coconut oil (liquefied) in a glass bowl. Pour one tablespoon of white beeswax pellets into the oil. Place the bowl in a pan. Add about 2 inches of water to the pan and heat the pan over low heat. The beeswax will melt into the oil. Once melted, take out your bowl from the pan and allow it to cool for a few minutes till you see the wax hardening slightly around the edges. Now, pour a cup of potable water in a blender and turn it on in high speed. Slowly pour the oil-wax mixture in. You could also use a hand-held immersion blender and a mixing bowl. The mixture will first get lumpy (natural reaction of mixing oil with water) but as you keep blending, it will emulsify and turn smooth and white. Keep blending till you get a creamy white lotion. This could take some practice! Now add 30-50 drops of essential oil – lavender, cinnamon or rosehip oil. Turn the blender on for just 2-3 seconds as you pour in the essential oils. Finally, add this cream to a clean dry container. Store it in the fridge to make it last longer.
Recipe for home-made sunscreen – Take 1/2 cup of extra virgin olive oil, 1/2 cup of extra virgin solidified coconut oil, 2 teaspoons of Shea Butter and 1/4 cup of white beeswax pellets. You can also add a teaspoon or carrot oil or Vitamin E oil to this mix, but this is optional. Mix all the ingredients in a pot, place a lid over it, and heat in a pan of water on low-med heat. Once it’s completely melted, add 2 tablespoons of zinc oxide powder. Stir a few times as it cools to make sure the powder is incorporated. You can add more powder for a thicker consistency. A drop of vanilla extract will impart some fragrance. The lotion must be used within 3 months and has an SPF of 15. Can’t find Zinc oxide powder locally? Chicco talcum powder is made up of zinc oxide and rice starch powder and can be used instead. Keep in mind that carrot seed oil alone holds an SPF of 35-40.
Recipe for home-made dry shampoo – This is a great innovation for anyone who travels frequently, or post-surgery, or for anyone who needs to shampoo everyday (say, an athlete) but wants to avoid shampoo-related dryness and split ends. These are not easily available in the Asian and Middle Eastern markets, but are simple to make at home. You need 1/8 cup of corn-starch, 1/8 cup of unsweetened cocoa powder, 1/8 cup of cinnamon powder and 3-5 drops of scented essential oils like lavender. Mix the powders in a dry bowl and then add the essential oil and continue mixing. The cocoa and cinnamon impart antioxidants, minerals and antibacterial properties. The essential oil gives fragrance. Store it in a dry air tight container. Comb and de-tangle your hair before use. Use a makeup brush to dust the powder to your roots (not directly onto your scalp). Comb it through your hair, from root to tips to ensure that the powder has been distributed evenly. Wait for 10 minutes, and then brush off any excess powder. Simple!
If you have naturally healthy and blemish free skin, then you can choose to go 100% natural like in ancient times. Use beetroot juice or blueberry juice to tint your lips. Use coal to colour the inside of your lids. You can use cocoa powder and shea butter to create bronzer and bronze eye shadow. A little beetroot juice or raw turmeric juice can be used as a blush (depending on your skin tone). Try henna to paint your nails. And rub some crushed strawberries and sea salt to your teeth to make them look whiter. You will look made up and yet perfectly natural!